
If I were making full length episodes, this would be part 1, followed by a quick Inkscape tutorial, then capped off with a discussion of Laser Cutting vs 3D Printing. I’m half tempted to make that super edit and upload it in the future, just to see how it would play.
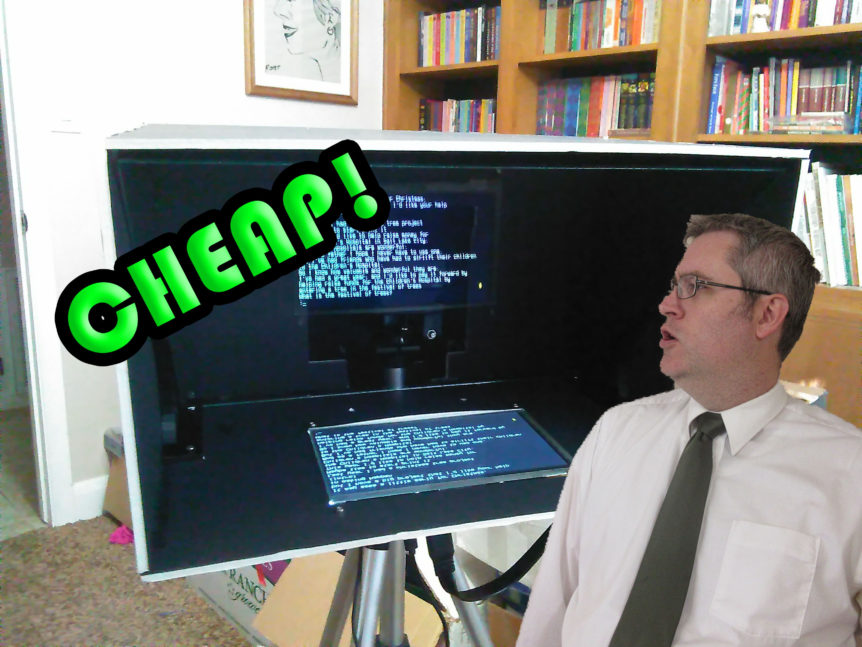
Making a Raspberry Pi powered Teleprompter is a great way to combine 3D printing, laser cutting, and Raspberry Pi computing. Here’s the step-by-step:
 Affiliate Links for External Components:
Raspberry Pi 3 – $48 at Gearbest or $38 at Amazon
SD Card – $12 for 16gig at Gearbest or $7 for 16 gig at Amazon
5V 2.5A USB Power – $4 at Gearbest or $10 on Amazon
Or Raspberry Pi 3 Starter Kit for $75 at Amazon
7″ Touch Screen HDMI screen – $79 at Gearbest or $54 at Amazon
- Download the SVG and STL files for the project
- Laser cut the bottom out of acrylic
- Laser cut the rest of out black foam core (Which I found at the dollar store)
- The trick to foam core is low power, high intensity, and lots of passes
- 3D print the STLs
- Mount the 3D printed Teleprompter-Holder.stl, Teleprompter-Glass_HolderA.stl, Teleprompter-Glass_HolderB.stl, and 7″ HDMI screen on the acrylic bottom
- I used a combination of short wood screws into the Teleprompter-Holder.stl and nuts and bolts for the rest
- Place the sides and back where they go and experimentally put the clear acrylic or glass in place.
- Press the four 3D printed Teleprompter-Glass_Holder_stubX4.stl into the foam core, 2 on each side, to hold the clear sheet in place
- Drive a short pointed screw through the foam core side to hold the stub in place
- Glue the sides, back and bottom in place
- White glue works great for attaching foam core to foam core, but for attaching to acrylic, you may need something stronger, like super glue
- Put the Raspberry Pi in it’s case and attach to the Teleprompter-Holder.stl with zip ties
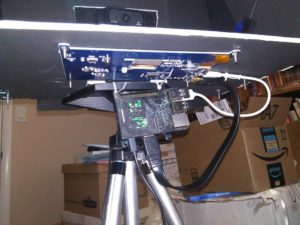
- Hook up the screen to the Raspberry Pi via the HDMI and USB connections
- Download the Raspbian Stretch Lite image
- Flash the image to a micro SD card (I like Etcher for this)
- Edit the Config.txt on the SD card with lines specific to controlling the HDMI screen with an added line to flip the image
- If you want to use a different monitor while doing the setup, then you can comment these lines out for now and add them later
- The lines are:
# For the 7" HDMI Touchscreen.
# Check the documentation that came with the Screen to confirm these are correct
max_usb_current=1
hdmi_group=2
hdmi_mode=1
hdmi_mode=87
hdmi_cvt 1024 600 60 6 0 0 0

#To flip the display for the teleprompter (You only need one)
#display_rotate=0x10000 # horizontal flip
display_rotate=0x20000 # vertical flip
- Plug in and turn on the Raspberry Pi
- Use sudo rasp-config to configure the password, wifi, and keyboard
- Use sudo dpkg-reconfigure console-setup to change the command line font size
- Create a shared folder on Windows and use sudo apt-get install cifs-utils; to connect it to a folder on your Raspberry Pi
- Drop text files into your shared folder and display them on your teleprompter with less
- Use a hand held USB micro keyboard to advance the text
Chances are you don’t have the exact same sort of stand for your camera, and if you have a bigger camera, some modifications will be necessary. In the end this may end up being an outline for you to build on.
What I didn’t mention in the video was how I’m kind of over shooting on the technology I’m using. The 7″ screen is actually a touch screen that I am not using the touch functionality of, but I couldn’t find a non-touch screen bare bones 7″ HDMI screen. And could this be done with a less powerful Raspberry Pi, like a Pi Zero W? Definitely. All I’m doing, really, is displaying text. But with a Pi Zero W, that would add a complication of either needing another way to hook up your keyboard or a different way to power the screen, since Zero only has one USB port, and right now the screen is powered through the Pi’s USB port. But then again, overshooting on the technology isn’t a bad thing. You don’t have to shrink wrap your tech to the project. Give it some breathing room and it can grow. I may never use the touch screen, but who knows what improvements the software could undergo. Am I going to be the one to write that software? Probably not. I’m pretty comfortable with the command line.
I wonder if the webcam can be routed through the Raspberry Pi to make an all-in-one recording/streaming station?
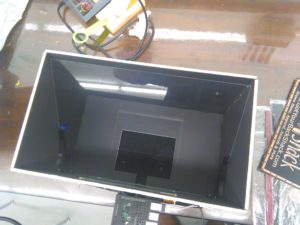
 I am super pleased with these little 7″ HDMI screens. I honestly think you need to get 2 and just keep them on hands at all times. I use one as a discrete second screen for my work computer. 1280×800 may not seem like enough pixels for the modern day, but it works for many applications. I’ve used it to do screen recording with OBS running on my laptop. I like the touch screen aspect of being able to hit “Stop Recording” no matter where my mouse is. OF course if you don’t have an enclosure, you may have to be creative. I was creative by cutting the box it came in into an enclosure.
There are also a 5″ version, but the resolution of 800×600 is too small for regular use, I can confirm. But it might be useful for other projects, that will be coming in the future.
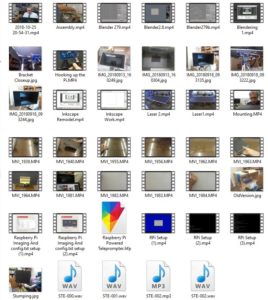 The number of source files in this video is too dang high! Not only did this project take a month of trial and error to get right, this video literally took 8+ hours to edit. Looking at all this source footage, I almost broke down and hired an editor to do it all for me. But I would have had to export my bumpers and intro and outro. One day I’ll find and employ and editor. One day.
Gathering the footage for a video during a project like this is always a challenge, especially when I often don’t have a scheduled time to work on this, it’s just whenever I have the time. If I’m going to do more videos like this in the future I need to get in the habit of just being ready to record.
As much as it may sound like I’m complaining at this point, this is the sort of video I really want to do more of in the future. More projects. More travelogues. More editing. And I sincerely hope that this is the sort of video people want to see more of. I hope it does well.